We use cookies to enable the proper functioning and security of our websites, and help us offer you the best possible user experience. By clicking Accept, you consent to the use of these cookies for advertising and analytics. You can change your cookie settings at any time. For more information, please read our Cookie Policy
Wouldn't it be great to be able to have a list of email addresses of all of your customers, without having the need to manually write it yourself? That's where the Mailchimp integration comes in. Through this integration, all your customers' email addresses are safely stored away in Mailchimp, which can be later used to contact these customers.
To set up the Mailchimp integration you will need an account on mailchimp.com
To integrate Mailchimp, we'll need to get some information from Mailchimp.
Keep this information noted down as we'll need it in the setup process.
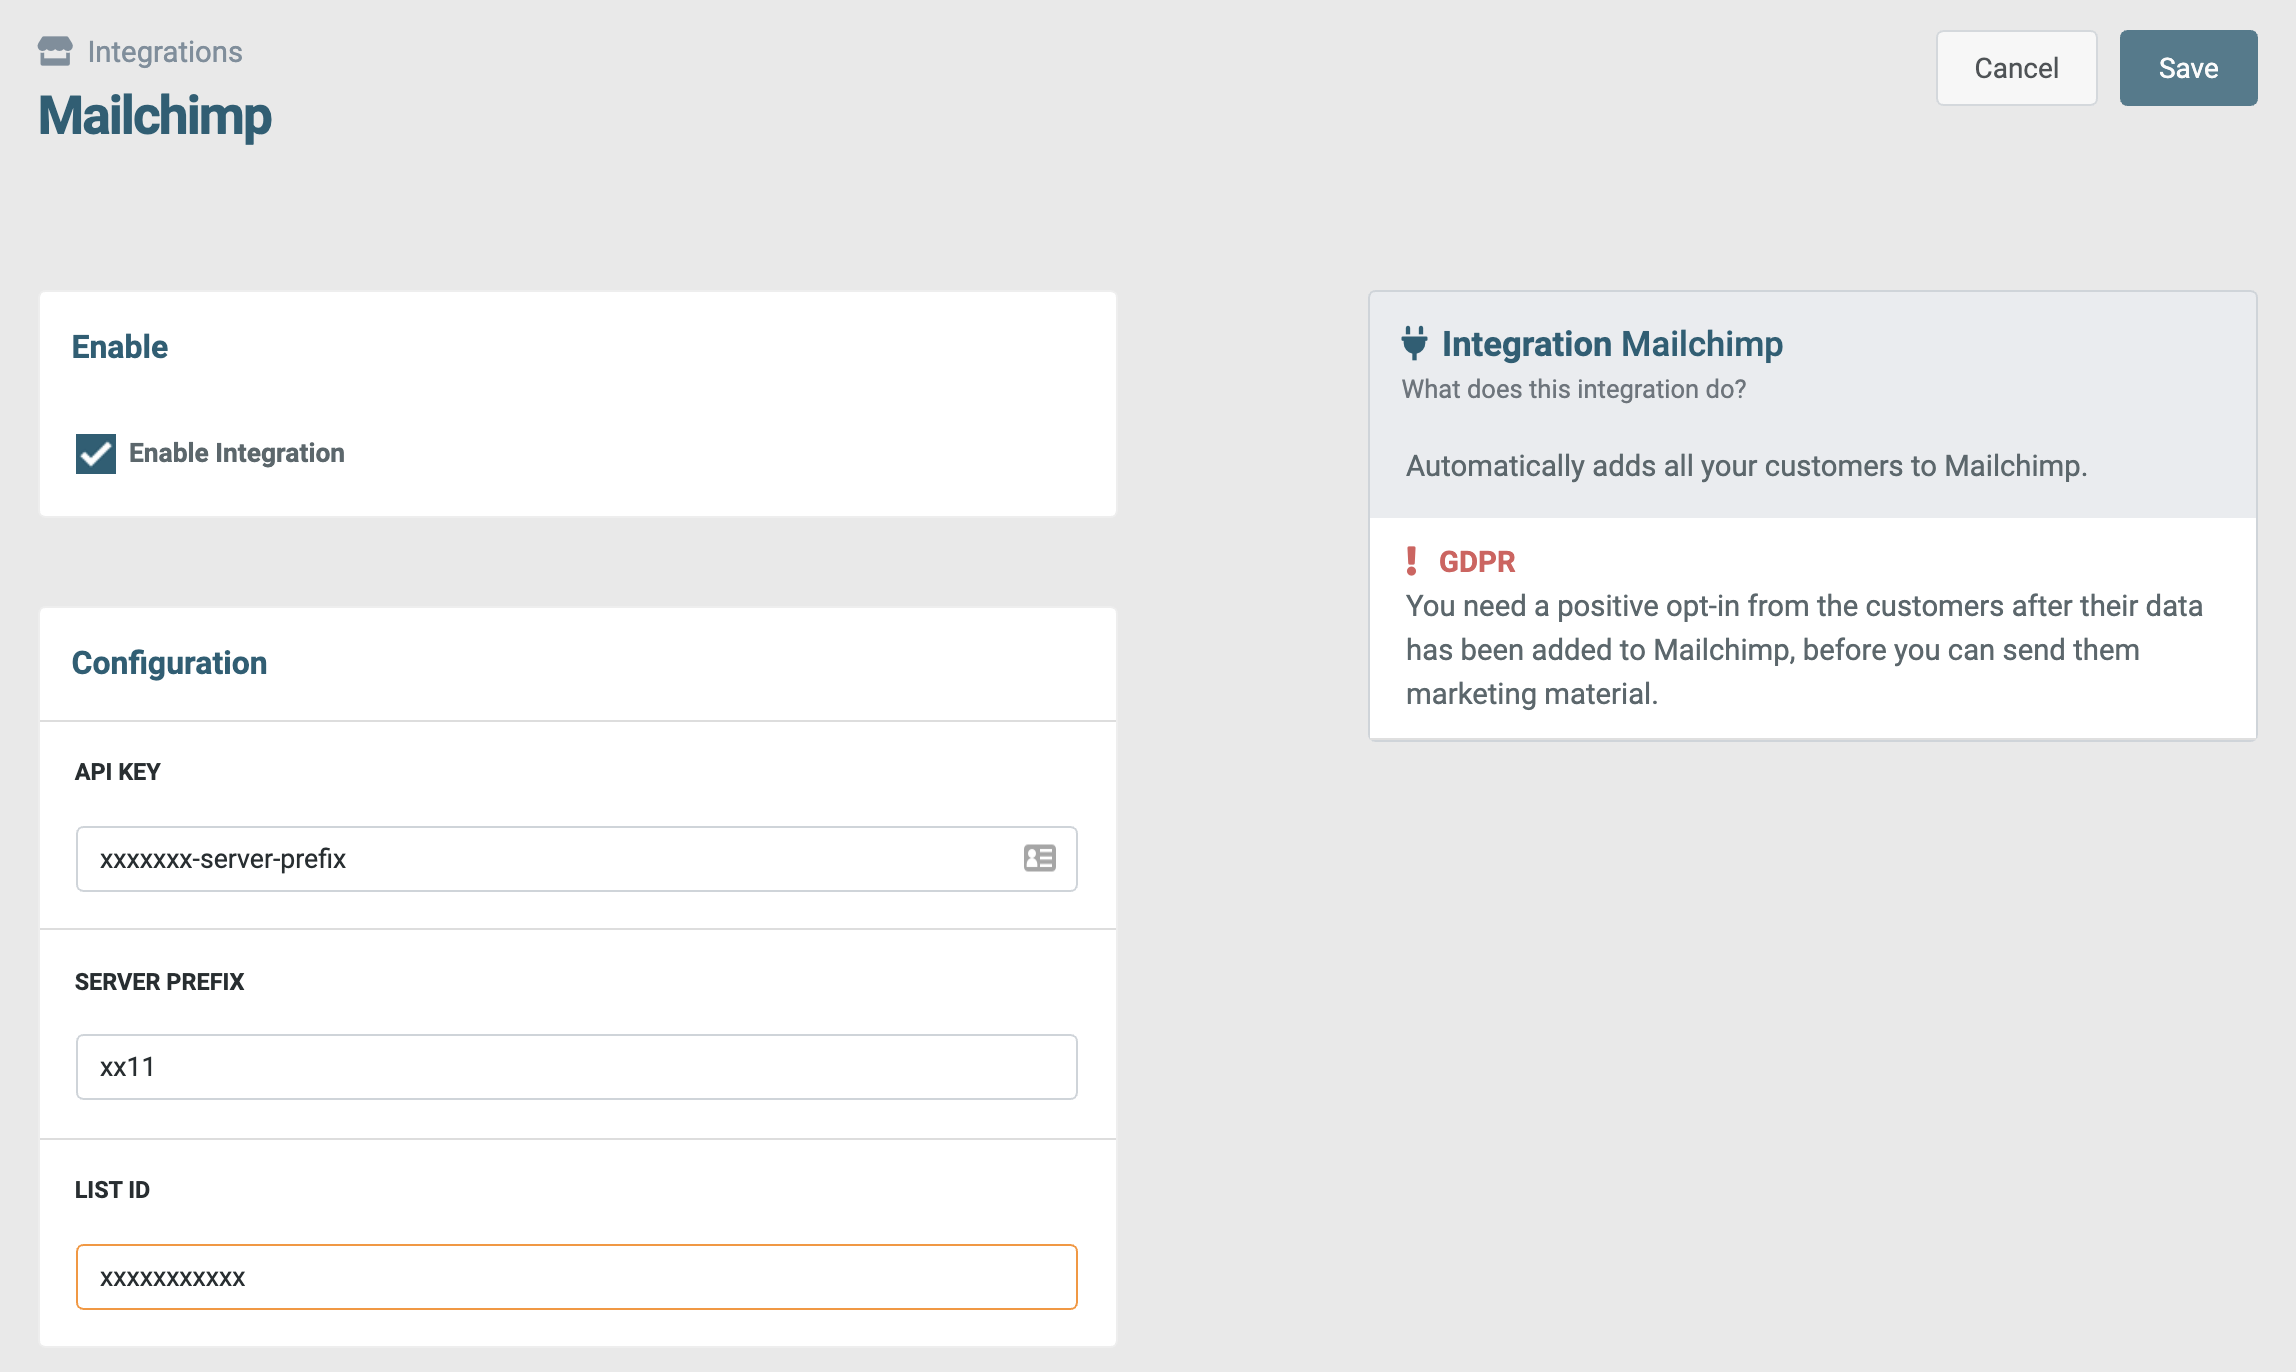
The API key is what allows Lifeboat to communicate with Mailchimp. To get this:
The server prefix is a special attribute Mailchimp uses to know how to handle your data. To get this:
The List ID is the programmatic name of your audience (contact list). To get this:
This integration by default limits you to only send transactional emails out of the synced contact to be GDPR compliant. If you'd like to send marketing emails you need to acquire consent from your audience to do so. To do this we suggest sending an automated email every time a person is added to your list, asking for consent. Once consent is given you may send marketing emails.
Start your online business today, the first 30 days are on us. No credit card or contracts required.
Start free trial